|
|
|
|
|
|
Superior Jeeps are built with superior components. This was my
thinking when I bought a Rubicon, and I will work from this premice over the
entire build up of Project Rubi. With this in mind I set out to find the
ultimate winch. I've heard all the arguments for and against electric and
hydraulic winches, and although electric winches have served me well for many
years I decided that only a Mile Maker hydraulic winch was capable of meeting my
needs for Project Rubi. There are many reasons why I made the switch from
electric to hydraulic, and here are a few:
- With hydraulic winching
there is no cool down period required during heavy use. Fact is you could
literally run the hydraulic winch at full capacity 24/7 because a hydraulic
winch is built to work continuously and consistently.
- Line speed was a big factor. Although electric winches are
a little faster when no load exists, when you're stuck really bad (when you need
a winch the most!) the electric slows to a creep while the hydraulic
keeps running strong.
- I've heard several accounts of electric winches
failing during/after fording in deep water. The Mile Marker hydraulic winch is
water proof and will function just the same completely submerged.
- To be truly effective, electric winches require battery and
alternator upgrades. While these upgrades are probably a good idea anyway, I
didn't want to have to just to be able to winch effectively. With the hydraulic
winch you install it and you're done.
I've heard the arguments about
using an electric winch when the engine won't run but I figure if your engine
won't run then you've got bigger problems than winching. If you're so deep under
water that the engine won't run, the electric winch isn't going to run either.
Not for long anyway! When you're upside down, righting your Jeep with any front
mounted winch is nearly impossible anyway. For everything you gain by going with
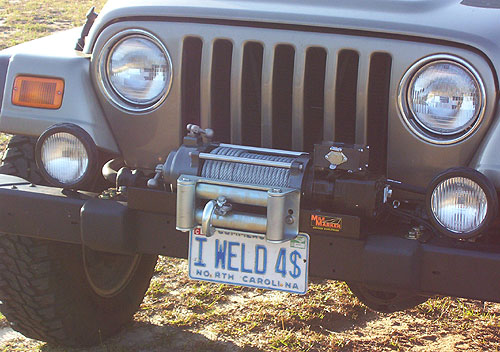
a hydraulic winch, the arguments against it seem awful weak. This is why Project
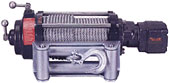
Rubi now proudly wears a 2 speed 10,500lb. Mile Marker hydraulic
winch.
The installation process was a bit intimidating at first, but I
found that once you tear into it taking it step by step its really not difficult
at all. I looked all over for an installation write-up similar to this one to
guide me but I couldn't find one comparable. Because of that I hope that some of
you find this write up useful as that is its exact purpose.
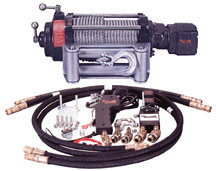
1- Unpack everything and compare what you have to the inventory sheet in the booklet that comes with your winch.
Mounting
2- Unbolt/remove the polyethelene anti-sway bar cover by removing
the 4 bolts (two on each side) that attach it to the frame using a 3/8"
wrench.
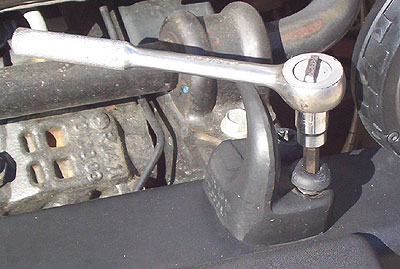
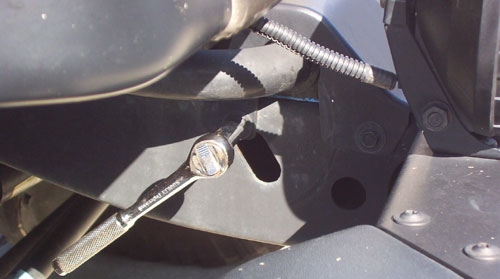
3- Remove your factory tow hooks if equipped. Some wise guy down at Jeep decided to use #55 TORX bolts to mount the factory tow hooks. If you dont have a #55 TORX tool on hand, you can substitute an 8mm allen wrench as I have done here. Remove the forward bolt from the anti-sway bar mount on each side using a 15mm socket.
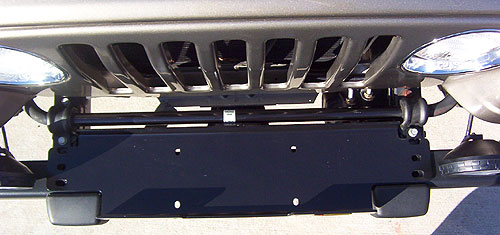
4- Before proceeding place your mounting plate on your Jeep to make sure all the holes line up properly. You don't want to get everything mounted only to find out that the plate won't line up. Traditionally it is recommended that you install the plate at this point but I find it more efficient to hook up everything I can off the Jeep first and then simply mount the plate.
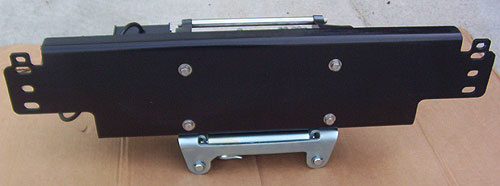
5- Remove the plate and mount the winch to the plate using the 4 stainless steel bolts/washers supplied with the kit. Screw the bolts in a few turns only as you don't want to torque them until after the roller fairlead is aligned.

6- Flip the plate over and mount the roller fairlead using the smaller lower holes (1 on each side) and the stainless steel bolts/washers supplied with the kit. Once you have the fairlead mounted you can rotate the winch again and torque the mounting bolts.
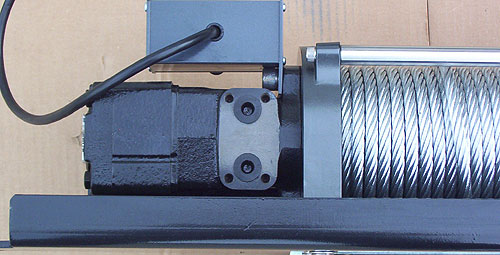
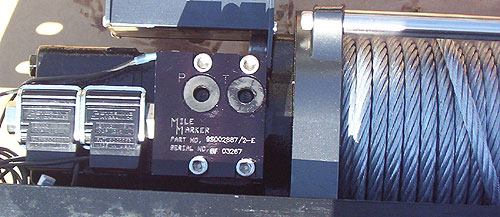
7- Rotate the winch so that you're looking at the back side and you'll see two rubber plugs. Remove them but don't discard them yet. Instead, place them into the "P" and "T" holes on the back of the solenoid assembly. This will keep contamination out of your solenoid assembly during that mounting process.
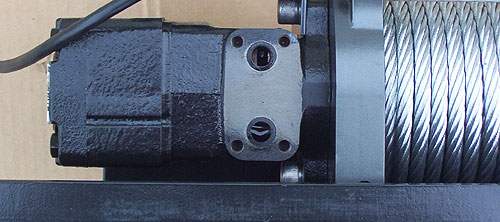
8- Make certain there is a rubber washer left in each hole. If they aren't there check to make sure they didn't come off with the rubber plugs.
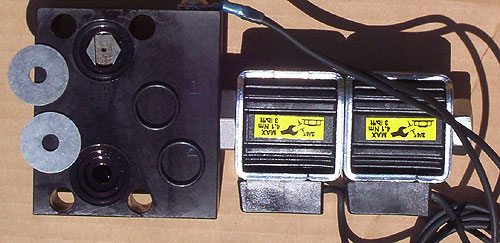
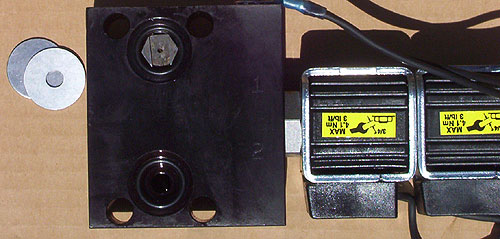
9- Your solenoid kit will include a flow restrictor, two O-rings, and two flat washers. Place the flow restrictor down into the smallest hole of hole #1 as shown above. The rectangular cut out will be facing you.
10- Place one O-ring into each hole. Drop it in the cutout that matches the size of the O-ring.
11- Place a flat washer over each O-ring. Each washer will drop into its own groove but the fit is not tight enough to support the weight of the washer so be careful on the next step!
12- This step is tricky. You need to flip the solenoid
assembly over so that the flat washers shown in step #11 meet the rubber washers
shown in step #8. If you flip the solenoid over the washers and O-rings
fall out, and if you attempt to rotate the winch motor over on top of the
solenoid assembly the rubber washers on the winch motor fall out. After
several failed attempts I used a small piece of cardboard to hold the flat
washers into the solenoid assembly and after rotating the solenoid assembly on
top of the winch motor I slowly and carefully slid the cardboard out. I'm
sure there are other ways of accomplishing this, and if you can send me a better
way I'll update this page. Regardless, my method worked and I could
proceed!
Once you're certain that everything is lined up as is should be,
insert and tighten the four solenoid assembly mounting bolts using a ¼" allen wrench. While not absolutely necessary,
its probably a good idea to use some lock tite on the threads. Notice the
rubber plugs in place to prevent contamination from entering the winch motor
during this process.
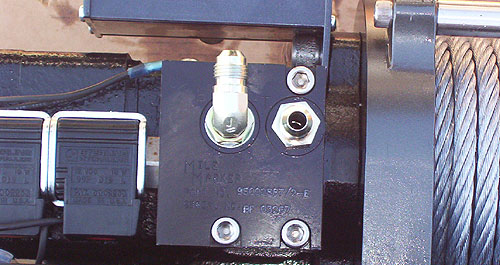
13- Remove and save the rubber plugs from the ports of the solenoid assembly and insert the male to male connectors. The "P" port will get the elbow connector, and the "T" port will get the straight connector. Rotate the elbow connector to whatever position it needs to be for your intended hose route. If you're unsure at this point just tighten it all the way down before you screw in the straight connector into the "T" port. You will be able to unscrew it a bit to run your hose horizontally and there is an adjusting nut on the elbow to tighten it in any position.
Plumbing
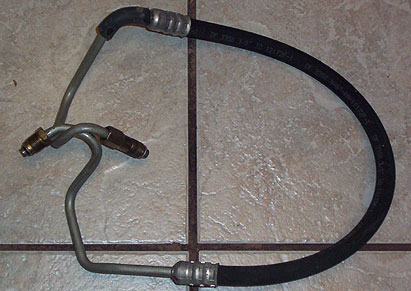
14- You'll notice a lot of additional elbow connectors in your kit but its not hard to figure out what to use where. Your power steering pump has two hoses connecting it to the gearbox. The hose that is clamped on is your low pressure return line. Unless you plan on installing an inline hydraulic filter (optional, I didn't feel I needed it) you will leave this line alone. Your other hose is your high pressure supply hose, and it needs to be removed. If you have line wrenches on hand you'll use a 16mm wrench on the pump end and an 18mm wrench on the gearbox end. Since its flared hose it isn't on very tight anyway, and can easily be removed using even an adjustable wrench. At this point take one of the rubber plugs (they just keep coming back!) that you saved in step #13 and insert it into the power steering gearbox to prevent a lot of additional power steering fluid loss. Although you could pitch the stock hose at this point I advise you keep it. Should you decide to sell or replace your Jeep later, having the stock hose on hand will make removing your winch much easier.
15- Take the elbow fitting show above and screw it into the longer of the two supplied hoses. Tighten this connection using two adjustable wrenches. Screw the flared end into the power steering pump. Wiggle the elbow as you tighten it to get it as snug as you can get it with your fingers. You're going to come back after you finish routing your hoses to tighten this connection, but that will be later. When you do come back to tighten this connector to the power steering pump it is critical that you only tighten it ¼ turn past finger tight.
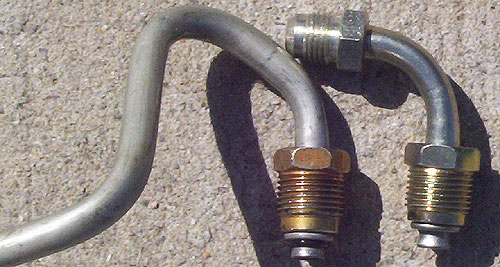
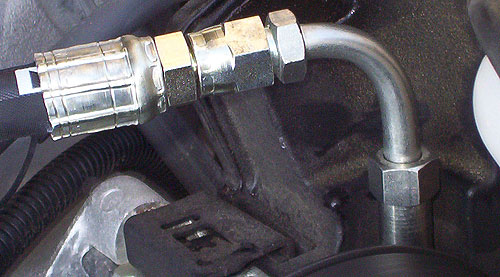
16- This is the elbow connecter that will screw into the power steering pump pressure port. Screw the beveled end into the shorter of the two supplied hoses and tighten that connection using two adjustable wrenches.
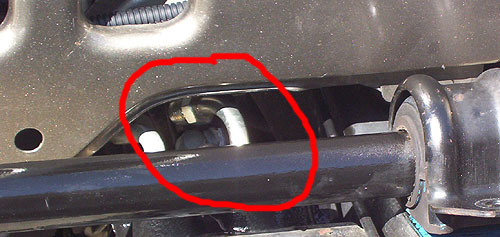
17- With the hose connected to the elbow, from underneath your Jeep you'll slide the connector over the existing return line still connected to the gearbox. Remove the rubber boot from the supply port on the gearbox and screw in the elbow fitting. It is tedious but if you take your time its not to bad to get it into proper position. Tighten up this fitting finger tight as well. At this point you can pick up your entire winch and mounting plate and set them on the frame of your Jeep. Make sure everything is centered and bolt the mounting plate the to frame of your Jeep using the large grade 8 bolts and washers supplied with your mounting plate. If the two bolts provided for your anti-sway bar mount are the wrong size, reuse your stock ones since there is still adequate thread left.

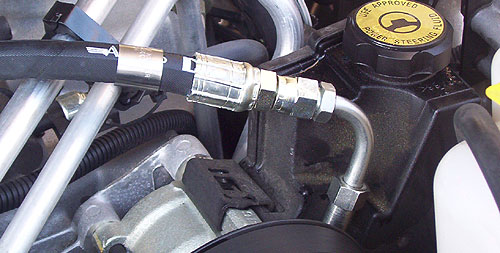
18- This will be the most challenging step yet. Its not really difficult, but routing your hoses can be very tedious if done right. Route your longer hose coming from the power steering pump in step #15 to the elbow connector on port "P" on the back of your solenoid assembly. Route the shorter hose coming from your steering gearbox in step #17 to the straight connector on port "T" on the back of your solenoid assembly. Tighten the hoses to the connectors using two adjustable wrenches. Follow both hoses making certain they aren't pressing against anything sharp. Make certain they aren't laying against any moving parts such as your steering components which over time can wear holes in the hose. Keep them off your fan and throttle lever. I ended up using about two dozen zip ties just to ensure proper routing. Take your time here!
19- Once you're certain that your hoses are routed properly, go
back over them again and make sure. When you're double certain that your
hoses are routed properly, go back up the the connector that screws into the
power steering pump. Make sure that it is as tight as you can get it with
your fingers, then take either an adjustable wrench or a 16mm line wrench and
tighten it another ¼ turn. Do not exceed ¼
turn! Repeat this same process on the elbow you connected to the power
steering gearbox. ¼ turn only!
Now that you're absolutely certain that
your hoses are routed properly and all your connections are tightened correctly,
top off the power steering fluid reservoir with power steering fluid.
Crank your engine for about five seconds and shut it back off. Top off
your power steering fluid reservoir again and look for any obvious leaks.
Crank your engine for another five seconds, turn it off, check for leaks, and
top off the reservoir. Crank your engine and turn your steering wheel full
right and left at least three times. Shut off your engine, check for
leakage, and top off your fluid reservoir. Repeat this process as many
times as necessary to stabilize the fluid level.
Wiring
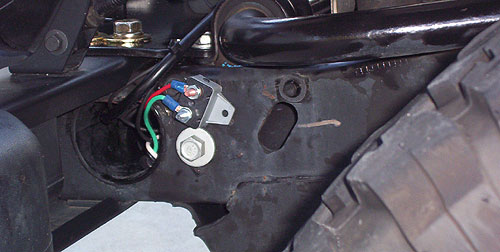
20- Wiring the solenoid assembly was very easy. I mounted my circuit breaker using one of the original screws and holes that used to mount my polyethylene anti-sway bar cover from step #2. I mounted my green wire (Power In) to the circuit breaker using the supplied nut and lock washer. From there you simply connect the male and female connectors and shove all the additional wiring into the hollow cross member on the front of the Jeep frame. I routed my hot wire coming into the circuit breaker from the battery through the same cross member. Since the electricity is only for working the solenoids and draws only 2 amps total, I plan on eliminating the circuit breaker all together and just running a wire straight from the battery to the solenoid assembly with an inline fuse on the battery end. Since the purpose of this tech paper is to show you how to properly install this winch however, I included the step as shown here. Water won't affect the function of the circuit breaker, but if it makes you feel better put some shrink wrap on everything shown.
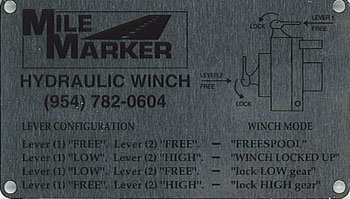
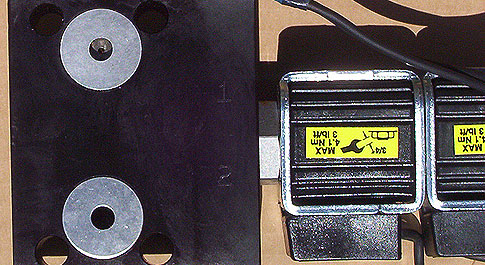
21- Before testing your winch you should get familiar with the lever configuration. At first it looks a bit complicated but after you look at it for 30 seconds it becomes self explanatory. You have two levers and four possibilities.
Lever #1 FREE + Lever #2 FREE = Freespool
Lever #1 LOW +
Lever #2 HIGH = Locked
Lever #1 LOW + Lever #2 FREE
= Low Gear
Lever #1 FREE + Lever #2 HIGH = High Gear
The levers are clearly marked to prevent confusion. For testing purposes, go ahead and place Lever #1 in the FREE position and Lever #2 in HIGH position placing you in high range.
22- It's time to test your winch! Plug your remote into the solenoid assembly, crank your Jeep, pull your cable hook, and press "Out" on the remote. If the cable spools in, remove the male and female connectors that you put inside the hollow front cross member in step #20 and reverse them. If the cable spools out as desired, press "In" on the remote and spool it back in.
Now would be a good time to preload your cable. Free spool your cable out and connect it to a stationary object such as another vehicle or a tree with a trunk protector. Back your Jeep up just enough to tighten the cable and pull up your emergency brake lever a few clicks. You want enough tension to keep the cable taught but allow the wheels to turn. Spool in the entire spool of cable with tension all the way to the hook. On level ground using high range on the winch will have adequate force to preload the cable. The point in preloading is to prevent tight wraps from being placed over the top of loose wraps which causes kinking and ultimately weakens your cable.
If you would like to see this winch in direct comparison with the competition, Mile Marker will provide you with a video comparison in VHS, DVD, or CDRom. Just fill out the form found at http://milemarker.com/video.html and they'll ship it to you totally free of charge.
My initial impressions are very positive and I'm looking forward to fully testing this system. The more I played with it the more I realized just how awesome this system really is. There is no difference in steering, no other upgrades are required, and as hard as I try I just can't find a reasonable weakness. The power steering pump is such an obvious source of immense wasted energy that this system makes perfect sense and the only thing I'm wondering now is why it took me so long to make the switch.
Look for very thorough testing of our Mile Marker hydraulic winch coming soon!
|
|